Monday, November 14th, 2011 at
9:37 pm
Well, its been awhile since my last post, but I’m back and at least for the first part of the winter will be posting weekly updates. Its been a pretty hectic month getting ready for the season. I think this is the most prepared I have ever been before the lifts have started. The new shop has been great and it has afforded me the luxury of a curing booth for the decks and subs. After pressing they all go into this 70 degree room for another 5 days to insure the epoxy cures completely.

Although the recycled graphics from the last few years was fun I’m glad to be rid of someone else’s logo on my stuff. This season we’re looking at white, with some soon to be added stickers.

The sliding truck plates are black but other then that I’m pretty much sticking with the same design. Three hole locations and two height options with a quick release pin.

Black and green grip for the tops, with a built up tail option available too.

The subs from last season worked great but there is always a tweak that can push them even further. I reworked both the 145 and 135 forms for the better. I most excited about the 135 with the slightly longer base and lower sweeps to the nose and tail. Always looking for that short board that will float deep pow. The new subs are in white.

One great thing about the Chiller shop is that there is a great testing zone in the back. Just need a bit more snow to soften those landings.

The shop is clicking right along but the website is badly in need of a product page and that is next on the agenda. Expect more pics and prices next week.
Friday, December 18th, 2009 at
10:24 am
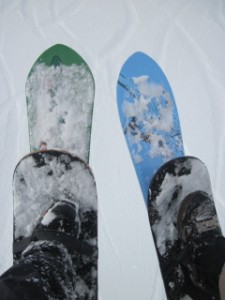
So the last three days delivered around 20” inches of snow to the resort. Last night it got kinda warm so the conditions were light snow under a heavy layer of wet stuff. Headed up first thing in the morning to catch the opening of the triple chair into south bowls. The chair had been closed during the entire storm so all the terrain around it would be untracked. I grabbed the 125 FPS first thinking that the snow had consolidated and I wouldn’t be sinking that much. At first on the steep stuff it seemed like the right choice but about half way down the south bowl where its not as steep and the temps were a bit warmer I had to straight line it just to get out. Back to the lodge for a board change. The 152 has a fat tail that will float pretty much everything but it does take a lot more leverage to carve on groomers. When I do take it out for resort riding its usually after big dumps where I won’t be spending much time on groomers. That’s where the 151 has a big advantage, it can handle groomers and hardpack easily, really easily so riding between stashes is easy and fun. Yesterday’s snow was heavy though and a real work out and the area we were riding was perfect for the 152 and riding was a breeze. Cole had his 151 and on the upper steeper section he was killing it but on the lower section where the snow was much heavier it was a bit harder. Not as tricky as the 125 but still you had to keep your weight forward to keep the tail from sinking. If the tail sank you slowed down and stopped, which meant possibly falling off your board and getting snow all over the grip and basically just wearing you out. Getting back up onto your board in deep powder takes some effort so you wanted to avoid that at all costs. You’ll notice the snow build up on the grip in the pic. Yea, heavy high moisture content snow sticks to it.
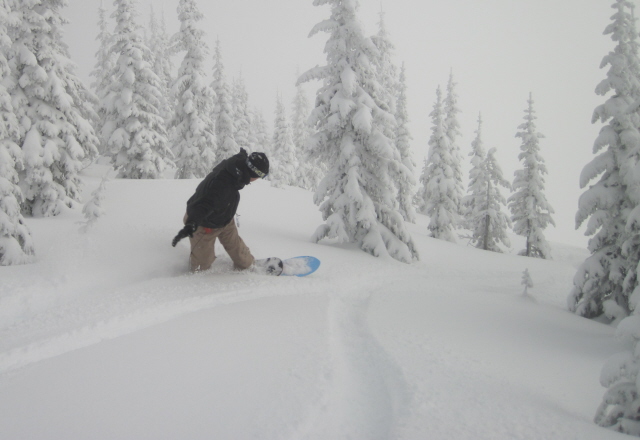
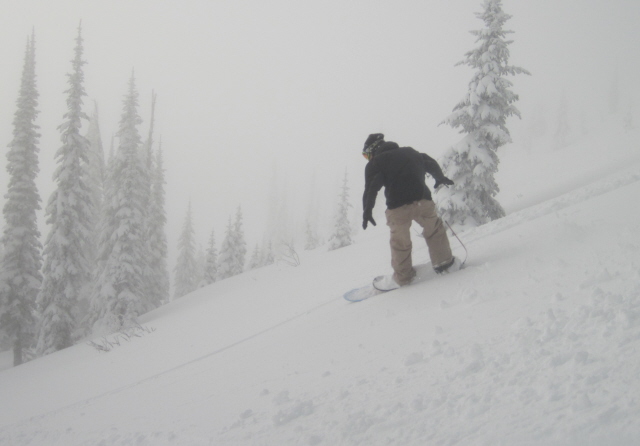
I had my leash break for the first time and just happened to be right in front of the patrol. Please remember to always check you equipment and leash for edge cuts and loose knots, a snow laden powder skate weighs a lot and can bust a simple cord! Only use webbing dog leashes or the hard core coil leashes. We don’t want run away skates period. Trust me even if it just goes into the trees you will either loose it or at a minimum have a HUGE hike down the hill.
Monday, November 30th, 2009 at
1:10 am
Over the years I have tried a lot of different options when it comes to chair lift straps. For those of you who aren’t familiar with this term let me explain it this way. Some resorts don’t want you to ride with a board in your lap. You can ride the chair but the skate must be strapped to your foot. Your not required to ride with it so you take it off at the top. Reasons for this vary but center on insurance restrictions and definitions of foot passengers. So back to the strap issue, here at Schweitzer we use the strap. These have ranged in style from actual snowboard bindings carried in a backpack, to various styles of nylon webbing. All of these systems had there draw backs and were each a pain in their own special way. Even the very last version of my foot strap which was the easiest of all to deal with, got old. This new system though changes every thing and has symplified the process on several fronts. First being it’s cheap, free in many cases. Second it’s really easy to put on and take off. Third you make it yourself which greatly reduces liability. So here we go. First find an old bike inner tube, cut it next to the stem of the tube.
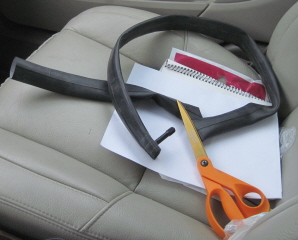
Then cut up the tube twice making a wide and narrow strip. The wide one goes around your deck, the narrow one around your ankle.
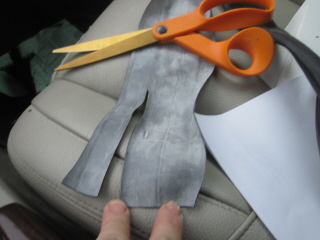
Tie the wide strip around the deck in between the trucks. The strip will stay in place when you ride. Tie the narrow strip around your ankle, not super tight but snug enough to insure it won’t come off. Use a square knot to insure it won’t come undone.
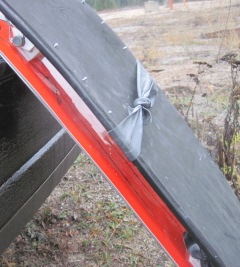
Put your foot under the board strap…
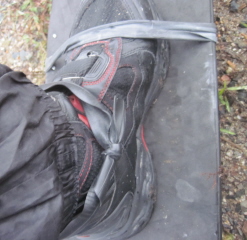
Stretch the ankle strap up and over your toe so that it captures the board strap. Your ready to load!
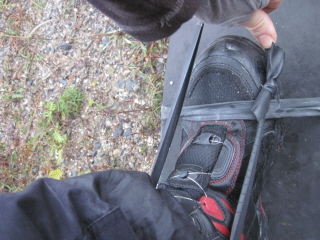
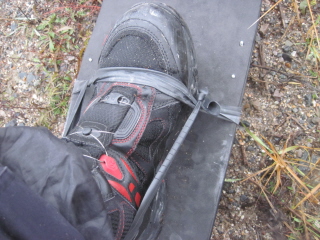
Remember, the ankle strap stays on your foot and the board strap stays on the board the whole time.
Wednesday, November 25th, 2009 at
9:08 am
Well, the mountain opens on Fri. I’ve hiked a couple of days and its been really fun. I’m off to shape a 36″ top deck this morning and mount it to another sub I’ve built with a less spatula shaped nose and better flex. Adam is sending me a 151, 152, and 158 today, should see those next week, get them built up and into the hands of some locals. Trucks will be ready first of next week. All of this leads to hopefully a fully functional Shop page on the site where you can purchase stuff. The grip continues to work great but I must admit it really hasn’t seen a true test, Snoqualmie !###%% snow. Look for a real update on the sub and grip after riding the mountain Friday.
Mark
Tuesday, November 17th, 2009 at
9:23 am
Have you ever heard the old saying, “if your grip sucks, then so do you.” Well I just made it up so good chance you haven’t. I believe its true though. Grip can make you feel invincible or balanced on a razor’s edge. Unfortunately this is kinda an overlooked area in snowskating and by that I mean there just aren’t a lot of choices out there. So today’s post will be a couple of tips for gripping your board. This will also prepare you for the not too distant future… where board makers will send you the deck ungripped to save money. If your re gripping a deck then the first thing to do is get the old stuff off. This is a royal pain in the ass and is akin to shaving a pig bald. Adam Bennett at Florida Powder Skates gave me this tip though, put the deck in the oven, (if it will fit) and set the temp at around 150-200 deg. This will warm up the adhesive and the grip will pull right off. I haven’t tried it but it sound better then shaving the pig.
1- Take the grip and position it over the deck, use a small clamp on either side to hold it in place. I like to trim around the tip a bit and take the excess off to build up the tail for a bit more concave.
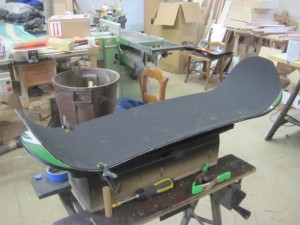
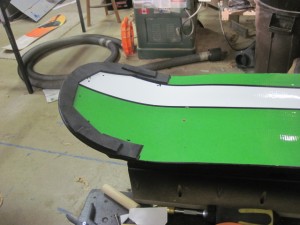
2- After the tail, reposition the grip over the deck and hold in place again with the small clamps at the bend for the tail in back. The clamps really help hold the grip centered and without them its easy to get off track and mess it up. Don’t use tape or it will rip the grip. If you don’t have clamps have someone else hold it there while you get started on the nose. Peel back about 2″ of the grip paper backing and fold it under.
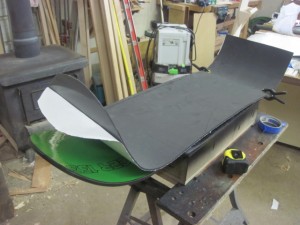
3- Press down the grip at the nose, starting in the center and working your way out to the edge with your fingers, making sure to avoid air bubbles (pop them with a pin if they sneak by.)
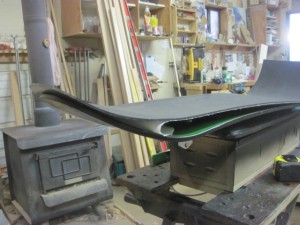
4- Keep working your way back to the tail in 6″ increments, pulling the paper under and back and smoothing out the grip from the center working towards the out side.
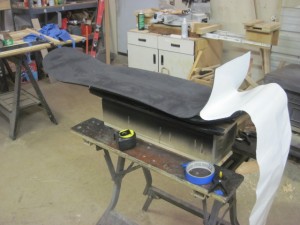
5- When you are finished adhering the grip you can cut the shape. This is the tough part to make clean, and the first try won’t be so pretty. You want to cut without stopping. Start by forcing the brand new razor blade up into the grip.
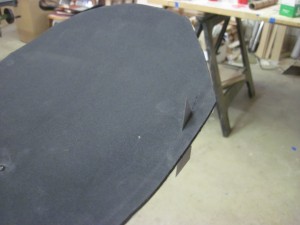
6- You can start a 1/2″ off the nose then cut towards the board until you hit the edge of the deck. Keep the razor blade angled back and pressed against the edge of the deck. Work your way around slowly. The sides will be easier then the tip and tail so go slow. Once you are done, press firmly all around the perimeter of the deck to make sure the edges don’t peel up later. Good luck!
Sunday, November 15th, 2009 at
10:52 am
Yesterday was a surprise all around. We got 2″ of snow in the valley and ?? at the mountain. So with the sun poking out I loaded up the “spatula” and raced up there. To date, the snowfall has been in tiny increments but Friday night delivered around 6″ to the mountain. This 6″ was a drop in the bucket compared to what they need to open. They do make snow at Schweitzer but only on the beginner hill. They build up huge piles in front of the machines then spread them out and repeat. I parked by some condos and walked to the run. The snow was pretty light and fairly deep. Rounding the corner and seeing the run my thought was, “dang, should have brought the powderboard.” Well I’m glad I didn’t cause this was a perfect time to test the “spatula”. At first glance it appeared that they had flattened out the mounds and that the fresh snow had fallen on top of the groomed run, sweet!! I hopped on and started down the slope. Being the bunny hill its not exactly steep but it has a consistent fall line that goes for a couple of hundred yards. Snowmaking snow is really gloomy and crusty until they spread it out so if you rode directly under the gun then it was weird but on the sides it was light. My first run was ok but not great, I was able to keep speed but not cut hard. When riding on the groomer’s track (not the blade just the bumpy track) the board turned fast and easy and felt really stable. But off the track it was hard to bury the tail. Could be the core was a bit stiff, something I felt from the start or more likely the inserts were too far back which kept the sub from bending where it should. Well, luckily I do have two rear truck settings although they are only an inch apart and might not make any difference seeing the adjustment is so minor. I pulled the pin and moved the rear truck towards the front hole, then hiked back up for a second try. Wow, what a difference an inch made, night and day and all of a sudden the nose was popping out and the powder wasn’t a struggle. Powder might be too nice of a word for crusty wet man made snow but it was untracked that’s for sure. The board rode really well, super fun on the groom and very lively off piste. Now this isn’t the proof I need to start building these, on the contrary this thing has only proven itself to insure another trip to the mountain, but I’m stoked for sure.
Now for the really BIG NEWS the grip kicked ass!!!!! No snow build up, no icy spots, didn’t deteriorate under my tread, looked the same when I left as it did when I started. Completely blew me away and puts my mind at ease.


