Thursday, December 17th, 2009 at
9:26 am
Been super busy in the shop with decks, subs and trucks plus the holidays just around the corner. Sent off a big stack to Adam, a board going to barontieri today and 23″ of fresh (heavy) pow at the mountain. Meeting Cole at 8:00 for some early tracks. As always I’m wondering 125 or 152. Would be nice to have a 151 for days like today. Bringing snowshoes and poles in case we need to duck a rope for the backcountry. Even when the mountain has a bunch of new snow the allure of untracked is powerful. Hopefully some pics for tomorrow.
Mark
Friday, December 11th, 2009 at
10:10 am
This can be a fun time of year, building boards in the shop in the morning and testing them in the afternoon. Sometimes it can be frustrating if its really dumping and there is lots to do in the shop but this year winter is off to a slow start. We’ve had a week of sub zero temps and HIGH winds which has scrubbed the backcountry, nothing a snowskate can’t handle though, further proof in my mind that all you need is snow to ride. Cole and I jumped out of bounds behind the quad, breakable crust with hidden obstacles. Don’t know if skiers or boarders would even bother but we had a blast. It was way to cold to stop and get some riding shots so I just took a few pics along the way.
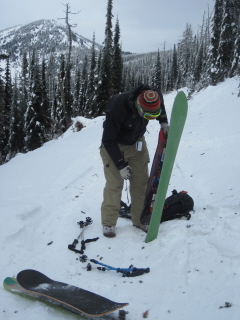
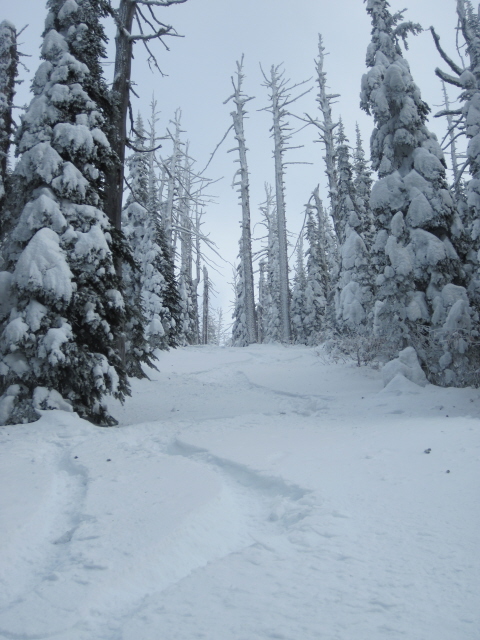
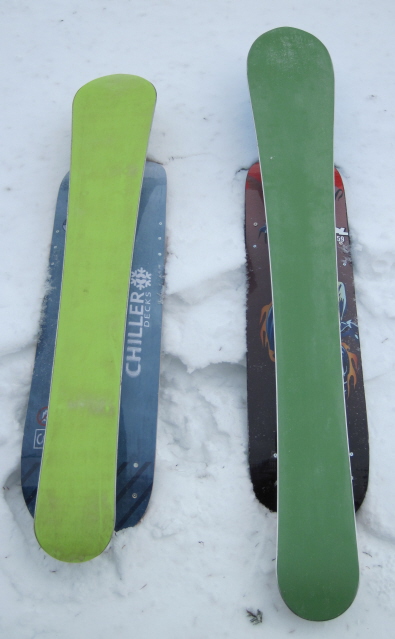
Cole brought his 151 and I had the 125. It will be interesting to see how these two boards compare through out the year. Yesterday the 125 was probably the easier choice, I’m not sure why but it was. We took turns riding both boards and the conditions were pretty crazy so I don’t think it really tells me much about how they compare. I guess it was easier to keep the tail down on the 125, you weren’t having to lean too far back which made turning easier. Like I said the crust was wicked but fun.
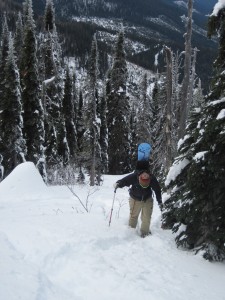
We put in a boot track and fired off four laps in a couple of hours them headed back to the resort and the barren ski slope.
I finally got a chance to ride the 151 on some hard core groomers. That thing is pretty amazing for how long it is and how locked in you feel on a carve, even over blue ice. That board will definitely be a contender on in-bounds powder days.
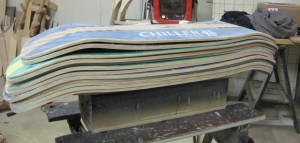
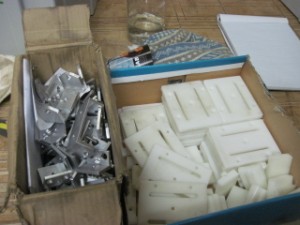
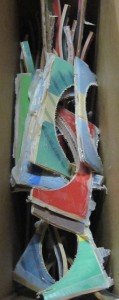
Just a couple of pics from the shop, a stack of decks, boxes of truck parts and a pile of off cuts. I hope to get the store up soon for easy online ordering. A lot of these decks are spoken for, either heading to Adam or for locals. If you want to be put on the list before the shop goes up email me your wants at chillersnowskates@gmail.com.
Thursday, November 26th, 2009 at
12:55 pm
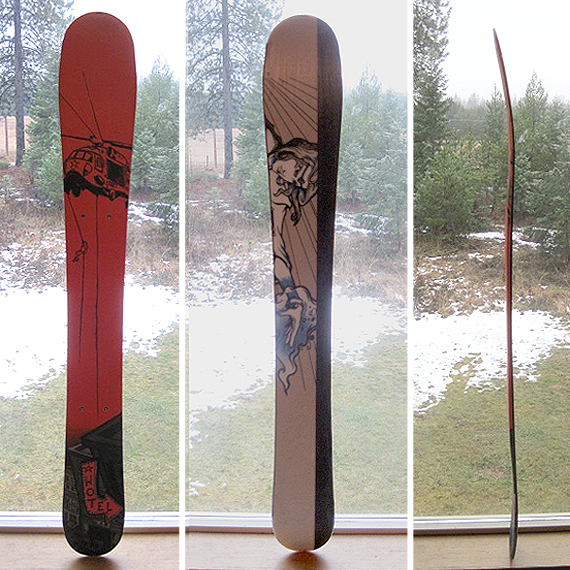
Working on refining my sub with some subtle shape and flex differences. Will be nice to ride the mountain on both set ups and compare how they handle. Same basic dimensions 0n this sub as the “spatula”.
– Length: 116 cm, 46″
– Nose: 155 mm, 6″
– Tail: 140mm, 5 1/2″
– Waist: 115mm, 4 5/8″
Wednesday, November 25th, 2009 at
9:08 am
Well, the mountain opens on Fri. I’ve hiked a couple of days and its been really fun. I’m off to shape a 36″ top deck this morning and mount it to another sub I’ve built with a less spatula shaped nose and better flex. Adam is sending me a 151, 152, and 158 today, should see those next week, get them built up and into the hands of some locals. Trucks will be ready first of next week. All of this leads to hopefully a fully functional Shop page on the site where you can purchase stuff. The grip continues to work great but I must admit it really hasn’t seen a true test, Snoqualmie !###%% snow. Look for a real update on the sub and grip after riding the mountain Friday.
Mark
Tuesday, November 17th, 2009 at
9:23 am
Have you ever heard the old saying, “if your grip sucks, then so do you.” Well I just made it up so good chance you haven’t. I believe its true though. Grip can make you feel invincible or balanced on a razor’s edge. Unfortunately this is kinda an overlooked area in snowskating and by that I mean there just aren’t a lot of choices out there. So today’s post will be a couple of tips for gripping your board. This will also prepare you for the not too distant future… where board makers will send you the deck ungripped to save money. If your re gripping a deck then the first thing to do is get the old stuff off. This is a royal pain in the ass and is akin to shaving a pig bald. Adam Bennett at Florida Powder Skates gave me this tip though, put the deck in the oven, (if it will fit) and set the temp at around 150-200 deg. This will warm up the adhesive and the grip will pull right off. I haven’t tried it but it sound better then shaving the pig.
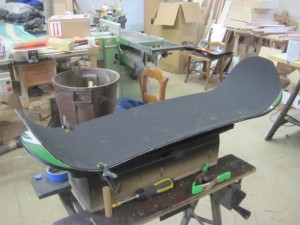
1- Take the grip and position it over the deck, use a small clamp on either side to hold it in place. I like to trim around the tip a bit and take the excess off to build up the tail for a bit more concave.
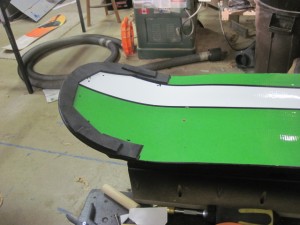
2- After the tail, reposition the grip over the deck and hold in place again with the small clamps at the bend for the tail in back. The clamps really help hold the grip centered and without them its easy to get off track and mess it up. Don’t use tape or it will rip the grip. If you don’t have clamps have someone else hold it there while you get started on the nose. Peel back about 2″ of the grip paper backing and fold it under.
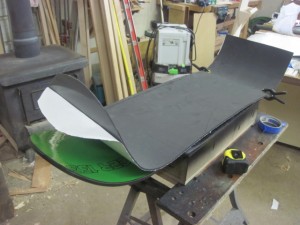
3- Press down the grip at the nose, starting in the center and working your way out to the edge with your fingers, making sure to avoid air bubbles (pop them with a pin if they sneak by.)
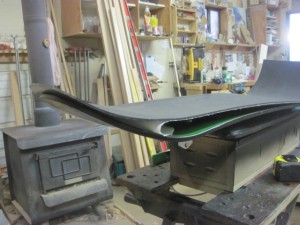
4- Keep working your way back to the tail in 6″ increments, pulling the paper under and back and smoothing out the grip from the center working towards the out side.
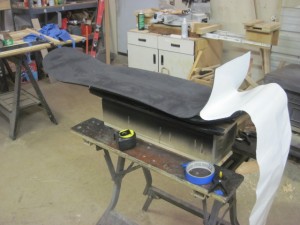
5- When you are finished adhering the grip you can cut the shape. This is the tough part to make clean, and the first try won’t be so pretty. You want to cut without stopping. Start by forcing the brand new razor blade up into the grip.
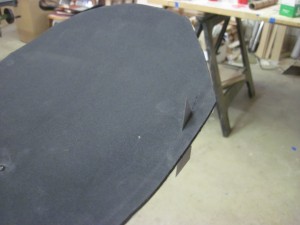
6- You can start a 1/2″ off the nose then cut towards the board until you hit the edge of the deck. Keep the razor blade angled back and pressed against the edge of the deck. Work your way around slowly. The sides will be easier then the tip and tail so go slow. Once you are done, press firmly all around the perimeter of the deck to make sure the edges don’t peel up later. Good luck!
Friday, November 13th, 2009 at
12:33 am
It may look like a “spatula” but it was tricky getting this egg on there 🙂
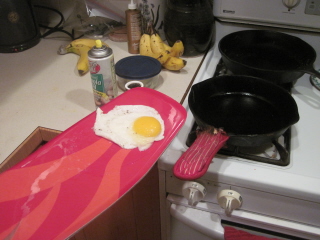
Before I get into too much detail on the sub check out the new narrow insert bases. These are mainly for the Ralston 1 1/2 insert spacing although the spatula is sporting a 2″ dim. That’s right I just introduced another option. Actually I think we should all change to 2″, would fit both narrow and wide boards. But I’m sure that’s not going to happen so I guess I’ll be alone in that.
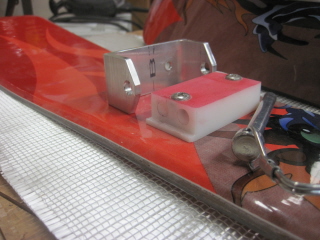
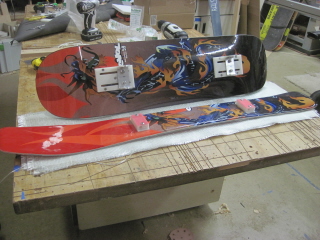
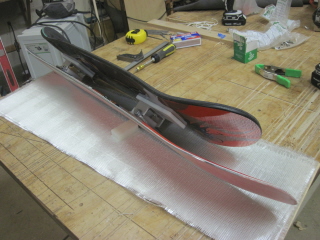
this either looks like a duck bill or some kind of serpent with its mouth open. Any other sugestions?
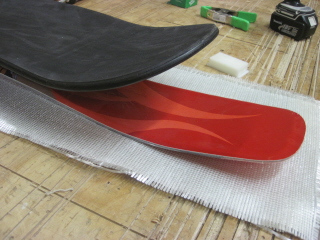
Ok even I’ll admit that the nose is HUGE and square. Uh….what can I say, I wanted a plunge proof nose. I want that thing to pop up like a toaster. I will concur that the shape could be a bit less sponge bob . The dims on this thing are 46″ long, 6″ at the widest on the nose, 5 3/8″ wide on the tail. Camber with early rise nose. Basically its a 40″ ski in a 46″ body. I have not ridden it but if we get a few more inches with this next storm I’ll at least hike a bit this weekend and report back to you.

Sunday, November 8th, 2009 at
11:05 pm
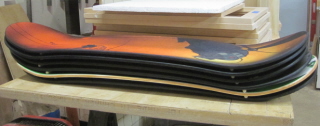 Seems like I’ve done this the last few years, post up a picture of an almost finished batch of boards. This is the first moderate size run of decks that I’ve done using the new press and new shaping jigs. As is always the case little mysteries present themselves while working and plans change. Nothing too drastic and in reality its all part of the process, weeding out the things that don’t work so the things that do can florish. Anyways here’s the shot, hope to have some finished pictures soon. I’m going with a blacked out look for the sidewalls, although you’ll see one finished natural. My thinking is that if the edges get scratched up then you can fix it with a sharpie. Hopefully I’ll have some finished pictures soon.
Tuesday, November 3rd, 2009 at
7:42 pm
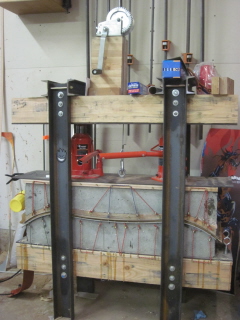
Here’s last summer’s project. The Jacks apply pressure and the boat jack brings the form up so you can pull out the deck. There’s one in the oven right now. I set this press up to do two decks at a time but right now just pressing singles until I get a bit faster with the epoxy. My old press is still up and running, it uses vacuum for pressure and has an adjustable form. I’ll still be doing the 37″ decks on it. This gives me a bit more flexibility seeing how I won’t have to change forms to do different sizes.
Tuesday, November 3rd, 2009 at
12:13 am
Ok I know I haven’t posted anything for months but it’s not because I haven’t been working on snowskate things. In fact it’s cause I’m spending too much time on decks and trucks that I’m having to work a bit more to catch up on the cabinet stuff, thus leaving little time for blogs. But I’ve got something HOT off the press for today. I’ve been thinking and talking about this style of sub for a few years now and I just realized no ones going to make it for me so I’ll have to do it. This is just a peek, more pics and dimensions to come.
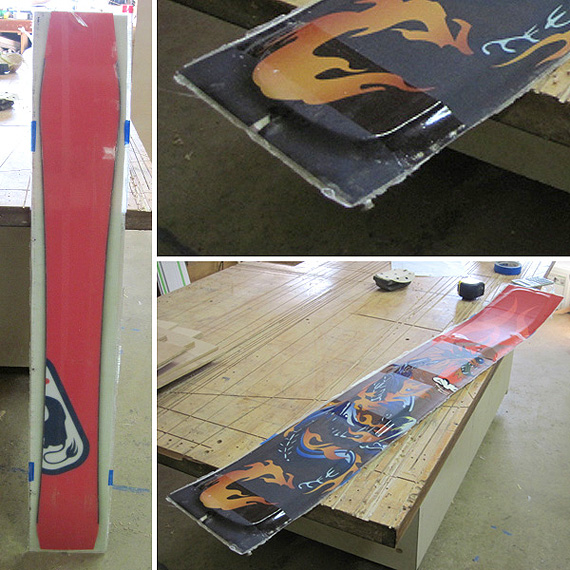


 Seems like I’ve done this the last few years, post up a picture of an almost finished batch of boards. This is the first moderate size run of decks that I’ve done using the new press and new shaping jigs. As is always the case little mysteries present themselves while working and plans change. Nothing too drastic and in reality its all part of the process, weeding out the things that don’t work so the things that do can florish. Anyways here’s the shot, hope to have some finished pictures soon. I’m going with a blacked out look for the sidewalls, although you’ll see one finished natural. My thinking is that if the edges get scratched up then you can fix it with a sharpie. Hopefully I’ll have some finished pictures soon.


